
· Maren Alcott
How to Use Heatless Curling Rods: A Step-by-Step Tutorial
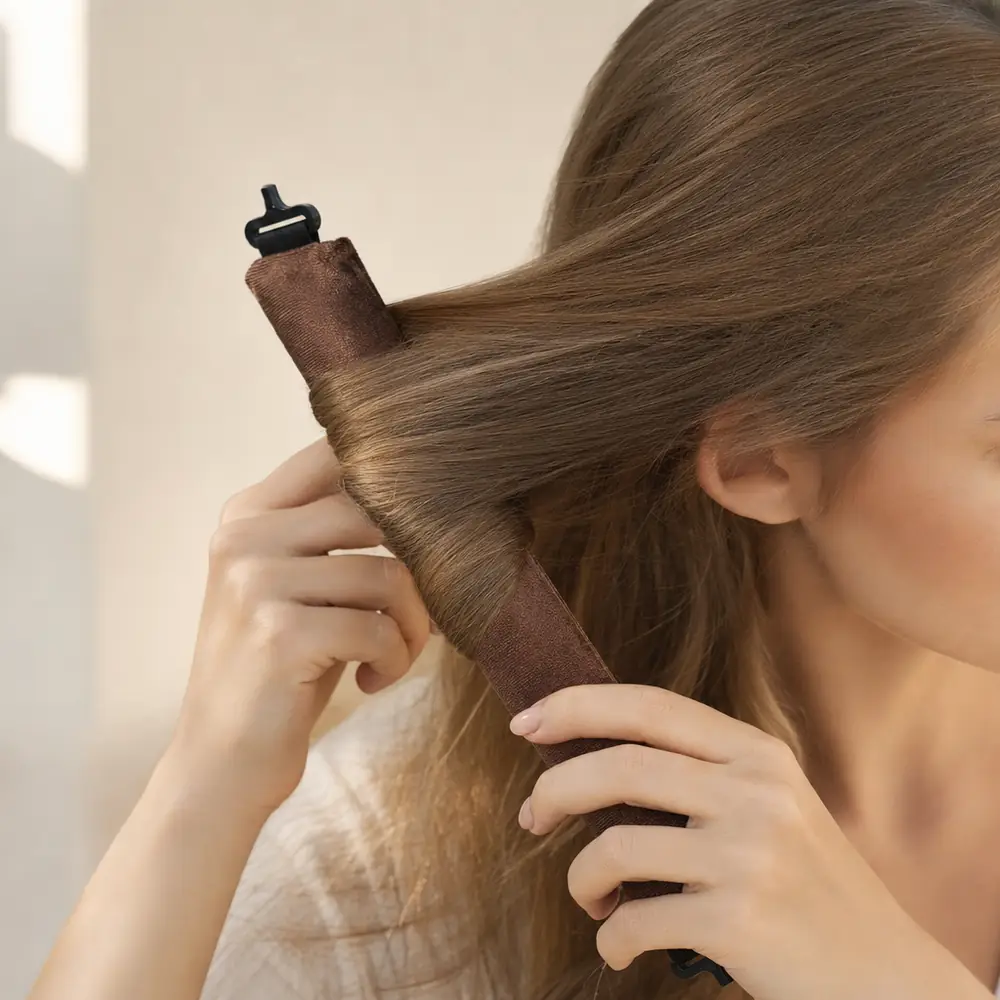
Heatless curling rods turn a night’s sleep into a blowout: you wake up to soft, voluminous waves, with no heat on your hair and nothing to plug in. If you are learning how to use heatless curlers for the first time, the method is simple. The details are what make the finish look smooth and full rather than kinked: how you section, which way you roll, and how close each rod sits to your head.
This tutorial uses the Lunelock Overnight Blowout Rod Set: three velvet-soft foam rods, each 10.6 in (27 cm) long and 1.4 in (3.5 cm) thick, with a matching 27.5 × 27.5 in (70 × 70 cm) satin scarf. It follows the rolling method in the photo guide that comes in the box, then adds a spiral method for more defined waves and a table of quick fixes.
What you need
The set comes in one color throughout: the rods and the scarf always match, in Coffee, Black, Khaki, Pink, Wine, Navy, Beige or Sky Blue.
- Three rods, each with a foam core under a velvet-soft cover, 10.6 in (27 cm) long and 1.4 in (3.5 cm) thick: the size behind big, blowout-style waves. For how that cover compares with other fabrics, see satin vs. velvet heatless curlers.
- One satin scarf, 27.5 × 27.5 in (70 × 70 cm), tied over the rolls at bedtime. More on it in satin scarf for heatless curls.
- A photo guide, tucked into the package.
Each rod has a short black elastic tab at both ends. A small T-shaped plastic hook tops the upper tab, and a keyhole-shaped plastic loop finishes the lower one; you can spot the hook at the top of the rod in the photo above. Beyond the set, keep a wide-tooth comb and a mirror at hand.
How to do heatless curls with rods, step by step
Roll in front of a mirror the first time, without rushing. The order follows the photo guide: prep, three sections, three rolls, then the scarf.
Step 1: Start with dry or barely damp hair
Start with dry or barely damp hair, and there is a good reason for it. Wet hair is more fragile: it breaks more easily when combed or brushed, the American Academy of Dermatology (AAD) notes. It also stretches under tension, and only up to a point before the change becomes permanent.
How far wet hair that has never been chemically treated can stretch without damage. Stretched between 30% and 70%, it changes irreversibly.
— International Journal of Trichology (Gavazzoni Dias), 2015
If you wash in the evening, wrap your hair in a towel to absorb the water rather than rubbing it, then let it air-dry until it feels only slightly damp. The full wet-or-dry comparison lives in heatless curls overnight.
Step 2: Detangle gently
Smooth lengths wrap smoothly, so work out every knot first with a wide-tooth comb, gently. If your hair is straight, the AAD suggests letting it dry a bit before you comb it; if it is textured or tightly curled, comb it while it is still damp. There is no need to overdo it:
Brush strokes a day that your hair never needs: dermatologists call the old rule a myth and recommend a wide-tooth comb, used gently.
— American Academy of Dermatology, 2026
Step 3: Split your hair into three sections
You need one section per rod, in the order the photo guide shows: the top first, then one side, then the other. Part a section across the top of your head, from your front hairline back toward the crown, about as wide as your forehead. Divide the rest into a left and a right half with a part down the back of your head, and keep the two halves the same size. Twist each side loosely and tuck it behind your ear while you roll the top.
If your hair falls well past your shoulders, read heatless curlers for long hair next; if it sits above them, heatless curls for short hair is the guide for you.
Step 4: Roll the top section from the tips to the scalp
Hold the top section straight up from your head. Place a rod horizontally at the very ends and lay the tips flat around it, smoothing them so they follow the curve of the rod instead of folding. Then roll the rod down toward your scalp, winding the hair around it like a big roller, until the rod rests on top of your head. Roll back, away from your face, for a swept-back blowout shape. Keep the tension even and snug, never tight at the roots.
Step 5: Roll the two sides the same way
Untwist one side and comb it smooth. Starting from the tips again, roll it up and away from your face until the rod lies close against the side of your head. Repeat on the other side, starting at the same height, so both sides match in the morning. Keeping these two rolls close to your head matters, because side sleeping takes up more of the night than any other position, as a study of working adults found:
Share of their time in bed that 664 working adults spent lying on their side, in a study that tracked sleep positions with body-worn accelerometers.
Step 6: Tie the satin scarf over all three rolls
Drape the scarf over the three rolls and tie it snugly, with the knot placed where it won’t press into your pillow. Folding the square into a triangle first makes it easier to tie. The scarf helps hold the rolls against your head while you sleep, and you turn over more often than you might think:
Position shifts per hour in bed, on average, among the same 664 adults.
Step 7: Sleep, then unroll in the morning
Sleep as you normally would. In the morning, untie the scarf and check that every roll is completely dry, including the hair closest to the rod. Then unwind each rod gently, in the direction it went in, and let the wave fall out of it instead of pulling it straight.
“works, is comfy and stayed on all night”
Verified buyer
Step 8: Finger-comb into shape
Rake your fingers through the waves, section by section, until they sit the way you like. Leave the brush for another day: the AAD’s advice is to brush and comb only to style, and your fingers separate the waves without smoothing them flat. To keep them going into the next day, see how to make heatless curls last.
“They work perfectly, beautiful bouncy curls as expected”
Verified buyer
Method 2: spiral waves with an upright rod
The same rods also give you a second look, the one in the photo at the top of this page. Instead of rolling a section like a roller, you wind it in a spiral down a rod held upright, for more defined waves.
- Prep and detangle as in steps 1 and 2, then split your hair into three sections, one per rod.
- Hold a rod upright beside your head, with its top end close to the roots of the section.
- Wind the section down the rod in a spiral, turn after turn, keeping the tension even all the way to the ends.
- Smooth the ends flat against the lower end of the rod. To hold them, use a soft covered hair elastic of your own, the kind the AAD recommends for styling.
- Repeat with the other two sections and leave the spirals in until your hair is completely dry.
- Unwind each spiral gently and separate the waves with your fingers.
| What changes | Roller method | Spiral method |
|---|---|---|
| Rod position | Horizontal, resting against your head | Upright, alongside the section |
| How the hair wraps | Rolled around the rod like a big roller | Wound down the rod in a spiral |
| Where you start | At the tips, rolling toward the scalp | Near the roots, winding toward the tips |
| The look | Big, voluminous blowout-style waves | More defined waves |
Big, soft volume is the look behind the name overnight blowout rods; the spiral is there for the days you want more definition.
Troubleshooting: frizz, flat ends, uneven sides, loose rolls
If the first morning isn’t quite what you pictured, the fix is usually small. Find what you see in the first column and change one thing the next night.
| What you see | Likely cause | What to change |
|---|---|---|
| Frizz | The lengths were rubbed: towel-dried with friction, brushed out, or shifting against the pillow at night | Blot with a towel, detangle before rolling, tie the scarf snugly and finger-comb instead of brushing |
| Flat or bent ends | The tips folded as the roll started, or didn’t go all the way around the rod | Smooth the tips flat around the rod before the first turn |
| Uneven sides | The two side sections were different sizes, or rolled to different heights | Part straight down the back, match the two halves and start both rolls at the same height |
| Loose rolls | Too little tension, a rod sitting away from the head, or a loose scarf | Roll snug but not tight, keep each rod against your head and tie the scarf firmly |
| Limp waves | The hair was soaking wet at bedtime, or still damp when you unrolled | Start dry or barely damp, and unroll only when every section is completely dry |
Frizz deserves a closer look, because rubbing is usually behind it: a 2015 review of hair cosmetics names attrition, the wear that comes from rubbing, as the main cause of frizz. That is why the scarf goes on snug and the brush stays in the drawer.
Quick answers
Do you do heatless curls wet or dry?
Dry or barely damp. Wet hair is more fragile, and the wetter it is at bedtime, the longer it needs to dry around the rod. The full comparison is in heatless curls overnight.
How long should I leave heatless curl rods in?
All night. The method is built around sleep: roll at bedtime and unroll when you get up. What decides the moment is dryness rather than the clock, so unroll only once every section is completely dry.
How to use heatless curling rods for beginners
Follow the eight steps above in order and keep the first night simple: three even sections, gentle tension, rods close against your head, scarf snug. Roll in front of a mirror, and let the photo guide in the box walk you through each step. One buyer summed it up:
“Easy to use and looks great on the hair”
Verified buyer
What is the trick to heatless curls?
Patience instead of heat. Water breaks hydrogen bonds in the keratin your hair is made of, the same thing that happens in a regular blow-dry, as the 2015 review explains, and hair that dries while wrapped around a rod keeps its curve when you unwind it. Sock curls rely on the same idea; a rod simply gives every section the same smooth, even shape to dry around. So the small details matter: barely damp rather than wet, even tension, and no unrolling until everything is dry. A curling iron takes the opposite route, with heat and speed, which is why dermatologists keep its contact short:
The most the AAD suggests leaving a curling iron in place, noting that excessive heat can damage any hair type.
— American Academy of Dermatology, 2026
Heatless rods put no heat on your hair at all. For the longer answer on heat and hair, read do heatless curls damage your hair.
Is 2 hours enough for heatless curls?
No single number fits everyone, because drying time depends on how damp your hair was when you rolled it and on how thick it is. That is why the set is designed to be worn overnight: timing stops being the question.
How can I curl my hair without heat in 5 minutes?
The hands-on part is quick: three sections, three rods, one scarf. The curl itself forms while your hair dries around the rods, which is why the method runs overnight and the waiting happens while you sleep.
Why do my heatless curls never hold?
Usually it comes down to one of three things: hair that was too wet at bedtime, rolls that were too loose, or waves brushed out in the morning. The troubleshooting table above has the fixes, and how to make heatless curls last covers the rest of the day.
Prefer one long rod?
If you would rather work with a single rod, the Lunelock Classic Curling Rod is one long foam rod under a velvet-soft cover, 59 in (150 cm) end to end, with flat ribbon ends; it comes with two matching scrunchies. It sits over the middle of your head like a headband: you wrap or twist each half of your hair around its side of the rod, fasten each end with a scrunchie or knot the ribbons, sleep, then unwind for soft waves through the lengths.
Ready for your first night with the three-rod set? Choose your color below. The photo guide comes in the box, so the steps are with you at bedtime.